 For calculating areas, you can also use the GetArea command.
Use the AreaNote command to highlight and annotate areas in a drawing.
You can specify areas by clicking a point within a closed boundary or by specifying points that comprise an area to measure.
Along with the calculated area, the command applies solid hatches and fills in bounded areas with a specified color.
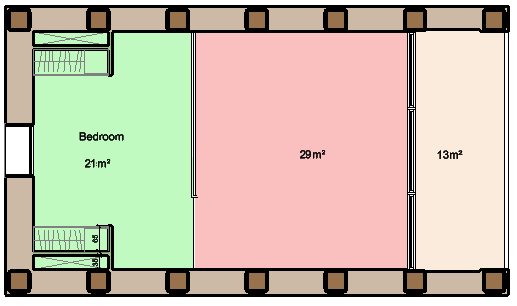
Filled areas help to differentiate areas. For example, within a floor plan of a building, you can highlight each room with a different color.
For calculating areas, you can also use the GetArea command.
The command calculates the following:
The command displays a dialog box where you can specify drawing units, solid fill properties, such as fill color and transparency. In addition to the calculated area, you can display a description.
To calculate the area and perimeter by specifying internal point:
To calculate the area and perimeter by specifying entities:
The calculated values display. The displayed information depends on the type of the specified drawing entity. For example, for Circles and Ellipses the command displays area and circumference.
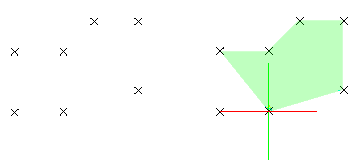
To annotate the area and perimeter by specifying points:
The defined area highlights dynamically in the graphics area as you specify points.
If you want to use specific points from drawing entities, for instance, a start or end point of a drawing entity, use the EntitySnap functions.
The calculated area display.
To calculate combined areas:
You can calculate the total area of several adjacent regions by specifying points or by selecting entities. Define an area by specifying points or using the Entities option.
The combined area is calculated.
Note: If areas intersect, the intersection area is subtracted from the main area.
Groups options for specifying what to display in the area annotation.
Groups options for combining areas.
| Button | Function | Description |
|---|---|---|
| Specify boundaries | Lets you specify closed entities as boundaries. | |
| Specify internal points | Lets you click points in enclosed areas to define the boundaries. | |
| Create new boundary | Lets you define enclosed area by specifying points. |
Groups options for customizing the solid fills.
Specifies the text height for subsequent or selected text. Select a value from the list or type a value. The text height is the distance from the baseline to the top of a regular uppercase glyph (cap line) and is also known as the cap height.
Access
Command: AreaNote
Menu: Draw > Area Note
Ribbon: Annotate > Revisions > AreaNote