-Hatch
Use the -Hatch command to fill enclosed areas or specified entities with a hatch pattern.
Hatching a drawing adds meaning and helps to differentiate the materials and areas. Some drawing applications such as construction drawings require hatch patterns which can increase the clarity and legibility of a drawing. Along with patterns, you can apply solid hatches to fill in a bounded area with the current color by selecting Solid option from the Pattern list.
It is the command window variant of the Hatch command.
To hatch an area, do the following:
To create a hatch:
- Type -Hatch at the command prompt.
- Select one of the following options:
- Additional options: Sets additional options for hatches and gradient fills. Additional options allow you to handle areas that are not closed, internal regions and the link between the hatch and the boundary.
- Annotative: Specifies whether annotative scaling is applied when you create or edit the hatch. When you change the scale of Viewports on Layout Sheets, hatch entities automatically maintain the hatch size. This property ensures similar pattern sizes in Viewports on layout Sheets.
- Create boundary: Lets you draw the boundaries in the same way as drawing a polyline. You can specify whether the hatch pattern updates automatically if the boundary of the hatch changes.
- Deselect boundary: Removes selection for all entities of the boundary definition.
- Pattern: Lets you select a Predefined, User defined or Solid hatch pattern. A solid hatch fills the bounded area with the current color.
- Pattern start: Lets you specify the hatch pattern start point.
- Placement: Lets you define the hatch placement in relation to their boundaries.
- Specify entities: Lets you select the entities that form the boundary or existing closed contours to serve as boundary.
- Transparency: Lets you specify the transparency level of the hatch or fill.
Specify the Boundary
There are several methods to define the boundary:
- Drawing the boundary similarly to a polyline.
- Selecting a set of entities that define a closed area.
- Specifying a point within a closed area: you need at least one point inside a closed area to create a boundary entity. To create other boundary entities, specify additional internal points.
To draw boundaries for hatch patterns:
- Specify the Create boundary option and press Enter.
- To specify whether you want to keep the initial boundary, type Yes or No. Press Enter.
- In the graphics area, specify the start point for the first segment of the boundary.
- Specify options for the next segments:
- Arc: Changes the segment type to an Arc. You can draw the boundary segment in the same way as an arc segment of a polyline. See Constructing Polylines.
- Length: Specify the segment length.
 Use the Undo option to cancel the most recent drawing operation. You can use the Undo option repeatedly.
- Specify the segment end point.
- Do one:
- Specify each successive segment according to steps 4 and 5.
- After specifying at least two segments, specify the Close option to create a closed boundary, or press Enter.
To specify boundaries by selecting entities:
- Type Specify and press Enter.
- Specify the Specify entities option and press Enter.
- In the graphics area, specify the entities that form the boundary.
- or -
Specify the selection method (one of the following options):
- Pick internal point: Lets you click points in enclosed areas to define the boundaries. You need at least one point inside a closed area to create a boundary entity. To create other boundary entities, specify additional internal points.
- Deselect boundary: Removes selected entities from the boundary definition. If you have already selected boundaries to hatch, you can remove them from selection. To select other boundaries, use Add boundaries.
- Press Enter.
- After defining the boundary, you can set the hatch pattern.
To deselect boundaries and define new ones:
- Specify the Deselect boundary option. Selected entities are removed from the boundary definition.
- In the graphics area, specify the entities for the new boundaries.
- or -
Select the new boundaries:
- Specify the Add boundaries option and press Enter.
- Click points in enclosed areas to define the boundaries.
Setting a Hatch Pattern
You can hatch areas using various hatch patterns or fill them with a specified color.
By default, when hatching a closed area, the hatch pattern starts at the origin of the drawing. You can specify another starting point, at a suitable location, to draw the hatch starting from the defined point.
To set a hatch pattern:
- Type Pattern and press Enter.
- Specify the pattern type:
- Predefined pattern:
- Specify the pattern name and press Enter.
- or -
- Specify the ? option to list the available predefined patterns.
- User defined:
- Type User and press Enter.
- Specify an angle for the hatch pattern and press Enter.
Standard hatch patterns are made up of horizontal or vertical lines or drawn at an angle. A hatch angle of 0 degrees defines a horizontal line.
Standard hatch patterns are made up of horizontal or vertical lines or drawn at an angle. A hatch angle of 0 degrees defines a horizontal line. A positive angle rotates the pattern counter-clockwise.
- Specify the distance between lines in the hatch pattern and press Enter.
Specify the distance in drawing units (default is 1). Change the line spacing to customize the pattern proportions for specific graphics areas.
- To specify whether you want to add intersecting lines, type Yes or No. Press Enter.
- Solid:
- Type Solid and press Enter.
Once the pattern is selected, define the boundaries to hatch or specify another option.
To set the hatch pattern start point:
- Type Start and press Enter.
- Specify one of the following options for the pattern start point:
- Current drawing origin: Keeps the current hatch origin (default).
- User-defined location: Sets the hatch origin in a specified location.
- In the graphics area, specify a point.
- To specify whether you want to use the specified location as default, type Yes or No. Press Enter.
- Use Boundary extends:
- Specify Center or one of the boundary corners (Top Left, Top Right, Bottom Left, Bottom Right).
- Press Enter.
- To specify whether you want to use the specified location as default, type Yes or No.
To deselect boundaries and define new ones:
- Specify the Deselect boundary option. Selected entities are removed from the boundary definition.
- In the graphics area, specify the entities for the new boundaries.
- or -
Select the new boundaries:
- Specify the Add boundaries option and press Enter.
- Click points in enclosed areas to define the boundaries.
Setting Additional Options for Hatch Display
Optionally, use the following options to better display and select hatched entities:
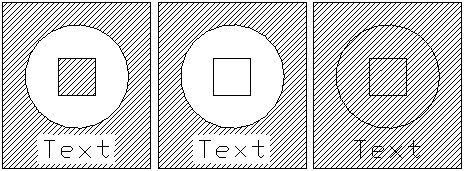
- Placement: By default, the hatch is created behind the hatch boundary to allow easier selection of the hatch boundary. You can create the hatch behind or in front of the hatch boundary, as well as behind or in front of all other entities.
- Transparency: Lets you control the hatch transparency to better view the entities beneath the hatch. This option is useful especially for solid fills.
- Annotative: Lets you specify whether the annotative scaling is applied when you create or edit the hatch. When you change the scale of Viewports on Layouts Sheets, hatch entities automatically maintain the hatch size. This property ensures similar pattern sizes in Viewports on layout Sheets.
To define the placement:
- Type Placement and press Enter.
- Specify one of the following options:
- Bring in front of boundary: Places the hatch in front of the boundary. Type Boundary and press Enter.
- Bring to front: Places the hatch in front of all other entities. Type Front and press Enter.
- Do not assign: Type Not and press Enter.
- Send behind boundary: Places the hatch behind the boundary. Type Behind and press Enter.
- Send to back: Places the hatch behind all other entities. Type Back and press Enter.
To specify hatch transparency level:
- Type Transparency and press Enter.
- Specify the transparency level. Specify a value between 0 and 90% where 0% means no transparency (opaque).
- or -
Specify one of the following options:
- Use current: Uses the current transparency setting for new entities.
- ByLayer: Uses the current layer transparency setting.
- ByBlock: Uses the current transparency setting of a block, if the hatch or fill is contained in that Block.
To create annotative hatch:
- Specify Annotative and press Enter.
- To specify whether you want to create an annotative hatch, type Yes or No. Press Enter.
Setting Additional Options for Hatch Boundary Detection
When defining hatch boundaries by specifying internal points, the command detects the entities that form the boundary. In this case, additional options allow you to control the automatic detection of boundaries.
To set hatch additional options to determine the boundary
- Specify Additional options and press Enter.
- Specify one of the following options:
Command: -Hatch