Creating Color Gradient Fills
Use the FillArea command to fill an enclosed area or specified entities with a solid color or a color gradient. Like hatches, color fills add meaning to drawings and help differentiate materials and areas.
To create a color fill:
- Do one of the following:
- Click Draw > Hatch/Fill.
- Type FillArea.
- In the Hatch dialog box, do the following:
- Optionally, specify additional options for fill and boundary:
- Click
 .
.
To configure the color fill:
- In the Hatch dialog box, select Fill.
- In Colors settings, configure the Colors of gradients:
- Select One color or Two colors.
- Click Choose color and select a color.
- Apply the Dark Light slider.
Note: To create a uniform solid fill, click One Color, then enter 50 in the field next to the Dark-Light slider.
- Choose a color gradient style from the Choose Style list.
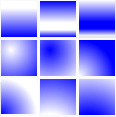
- Change the orientation by setting the Angle.
- Optionally, select Symmetric to ensure the pattern is symmetric within the boundaries.
- Click .
To specify boundaries for fill areas:
In the Hatch dialog box, on the Hatch tab, select a method to specify boundaries.
| Button |
Function |
Description |
 |
Specify entities |
Lets you select the entities that form the boundary. |
 |
Specify points |
Lets you click points in enclosed areas to define the boundaries. |
 |
Rebuild boundary |
Replaces a boundary after removing (enabled only when using the EditHatch command). |
 |
Delete boundary entities |
Removes boundaries from the set of entities that form the boundaries. |
 |
Highlight boundary entities |
Displays the boundaries in the drawing. |
Command: FillArea
Menu: Draw > Hatch/Fill